Deep-cleaning your home is a great way to get it organised and spick-and-span for the new year! In just 2 weeks, you can have your entire home clean and clutter-free.
Having a home full of mess can be stressful, but with a little bit of elbow grease and our deep-cleaning tips, you’ll have your home looking like new in no time!
Here are some tips to help you get started!
1. Make a plan
Decide which rooms you want to tackle first and make a list of all the things you need to do in each room. This will help you stay organised and on track. To start off, it is important to evaluate which room has the most clutter and dirt.
These are the rooms you will want to focus on first.
2. Gather your supplies
Make sure you have everything you need before you start house cleaning. This includes all of your cleaning products, rags, vacuum, etc. Having everything in one place will make cleaning much easier and more efficient.
3. Start with the ceiling
When deep-cleaning, it is important to start from the top and work your way down. This way, any dirt or dust that falls will be cleaned up as you go. Start by dusting off any cobwebs from the ceiling and then move on to cleaning the light fixtures.
Once the ceiling is good to go, move on to cleaning the walls.
4. Clean the walls
Wipe down all the walls in your room with a damp rag. Be sure to get in all the nooks and crannies, as well as around light switches and outlets. If you have any marks or stains on your walls, be sure to use a cleaner that is specific for that type of stain.
You can also use a cleaner such as Mr Clean Magic Eraser to help with tougher stains.
5. Vacuum and mop the floors
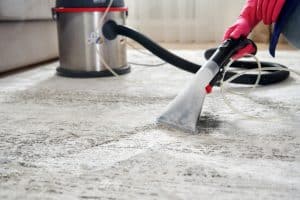
After you have cleaned all surfaces in a room, it is time to move on to the floor. Start by vacuuming all carpets and rugs. If you have hardwood floors, be sure to sweep and mop them rigorously.
Vacuum all the floors in your room, including under any furniture if possible. Once the vacuuming is done, you can move on to mopping or sweeping, depending on the type of flooring you have.
6. Dust and polish all furniture
After you have cleaned the floors, it is time to move on to dusting and polishing all the furniture in the room. Use a microfiber cloth to dust off surfaces such as tables, chairs, dressers, etc.
If you have any wooden furniture, you can use a polish to make it shine. Be sure to follow the instructions on the polish before applying it to your furniture.
7. Clean window treatments
Window treatments are often forgotten when cleaning a room, but they should not be overlooked! Start by taking down any curtains or blinds and giving them a good shake outside. This will get rid of any dirt or dust that has accumulated on them
Once you have shaken them off, put them in the washing machine and wash them on a gentle cycle. If you have any blinds, be sure to dust them down with a microfiber cloth.
8. Clean all appliances
Appliances such as the microwave, oven, fridge, etc. should also be cleaned during a deep-clean. These are areas of your home that can often get neglected but can become very dirty over time.
Start by wiping down the outside of all appliances with a damp rag.
Then, move on to cleaning the inside of the microwave and oven (if necessary). Be sure to clean out the fridge, as well as any other small appliances you have in your home.
9. Wipe down cabinets and shelves
Cabinets and shelves can also become dirtier over time. Wipe them down with a damp rag, being sure to get in all the nooks and crannies.
If you have any grease or grime build-up, use a degreaser to help remove it.
10. Declutter
The final step in deep-cleaning your home is to declutter. This involves getting rid of any items that you no longer need or use. This includes clothes, books, toys, etc.
Donate or sell any items that are still in good condition and throw away anything that is broken or damaged beyond repair. This step will not only make your home look cleaner, but it will also make it feel more spacious.
Deep-cleaning your home can be a daunting task, but it is definitely doable with a little time and effort. By following these simple steps, you will be able to have a clean and clutter-free home in no time!


